You have draw the frame, according the dimension you need, and hopefully make a bellows exactly fit your camera.
But I tell you, you are not.
Your bellows will be too small for your frame, front and back.
Let me show you why.
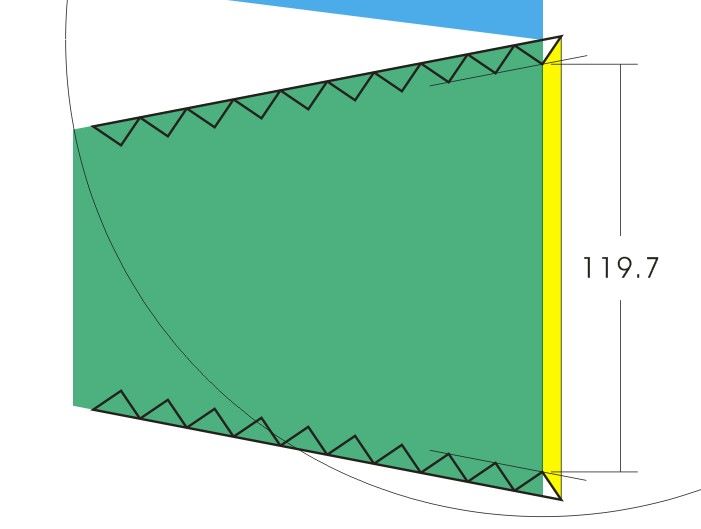
It is 120mm we need for back opening, if you remember. And that was not defined by first rib, the first rib will be folded in and glued to the second rib, so it is the second rib really counts.
The real dimension I show you in the picture tells you, your bellows is too small, only 117.6mm on this side, not 120mm. That yellow rib, will be folded in and glued with the second one.
 |
| From Drop Box |
Other instruction will suggest to make some bellows in paper, measure the sizes of opening, then modify, and make another one paper model, measure, modify again...... till you satisfied.
Well, I like to make things correct in one shot.
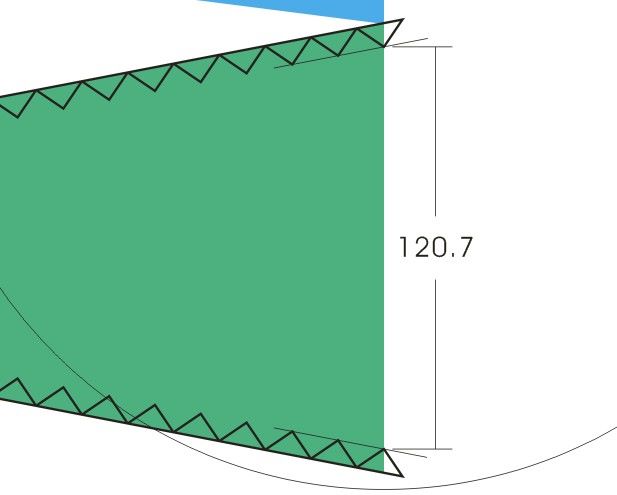
Draw line on the tip of triangles, extend it out of the shape, then move the triangles align the line, till first tip reaches the edge of the shape.
 |
| From Drop Box |
Now let me show you the dimension of the second rib became 119.7mm, very much closed to the size we need.
 |
| From Drop Box |
But if you think we are there now, then you are wrong again!
Since bellows is not made by air, it got thickness, some people quit making bellows themselves just because they can't find material thin enough, bellows is too thick squeezing into camera body.
My material produces 0.25-0.3mm thickness when 3 layers combined, and two sides makes 0.5-0.6mm space occupied, so if you are happy with 119.7mm, thinking that is good enough for 120mm, then at final your bellows only got 119.2mm in the best situation, most of time you get merely 118.5 max.
That is fine to you? well, not me.
I can not tolerate letting negative space wasted even 0.1mm in length, it is so precious.
So here we go on next step, give them more spaces.
Stretch green shape 1mm downward,
 |
| From Drop Box |
 |
| From Drop Box |
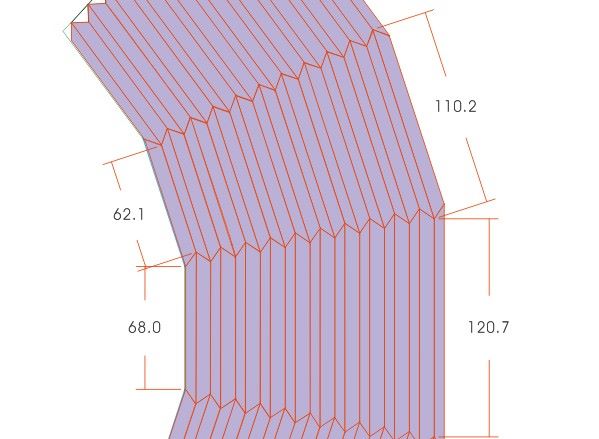
Now the edge size for 2nd ribs becomes 120.7mm, enough for opening and layer thickness. In many cases, I will leave 2mm more for it, a bigger opening is better than a smaller one.
 |
| From Drop Box |
Now you are making a bellows that really fit your need!
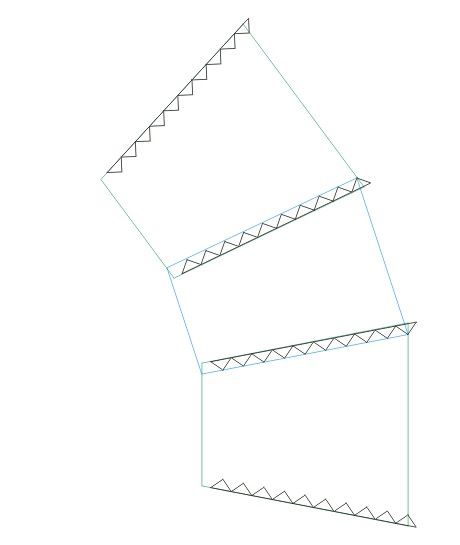
Inspired by green shape, blue shape also stretch 1mm, upward. Then rotate blue shape, align the base line of triangles, meet the first triangle's tip. For showing their relations more clearly, I take off the color of two shapes, instead of colored frames. Here you will notice that two shapes intersect with each other on border.
 |
| From Drop Box |
Then copy green shape with triangles to other side of blue shape.
 |
| From Drop Box |
Copy again, this time the blue shape with triangles to other side of green shape.
 |
| From Drop Box |
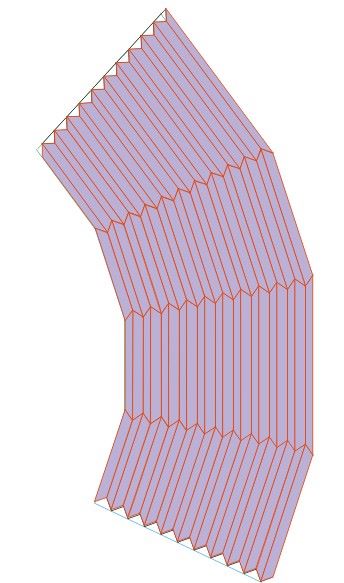
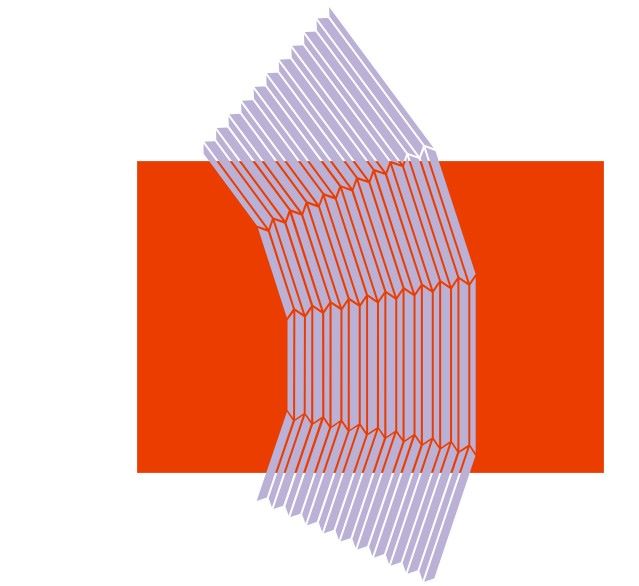
There we are, guides for four sides are finished. Based on these guides, we are now connect each tip into a rib.
 |
| From Drop Box |
finish all the ribs, and now we are almost done.
 |
| From Drop Box |
You can check each side's dimension, to see if they fit your need.
 |
| From Drop Box |
Then now comes the final step, spaces between the ribs. For bellows at 4x5 format or smaller, 1.2~1.5mm space is acceptable, use the spacing option or outline option in graphic program, you can easily adjust spaces between these ribs, then they are done, ready for plotter.
 |
| From Drop Box |
 |
| From Drop Box |
Now I need rest.
No comments:
Post a Comment